The best all-round seat at a wrestling show is the first lower-bowl section on the 100s level, a few rows back on an aisle. That spot gives you a full view of the ring, a clear look at the entrance ramp and enough elevation that nobody’s head blocks the wrestling. Learning how to pick seats at a wrestling pay per view comes down to matching one section to what you actually want from the card.
Here is the honest version: ringside is spectacular for the first ten minutes and frustrating for the next two hours. Fans in wrestling ticket threads keep landing on the same point — floor seating past the first couple of rows means watching the back of someone’s head while paying several times what a lower-bowl seat costs.
So before you click buy, work through these seven steps in order.
Table of Contents
- What You Need Before You Open the Seat Map
- Step-by-Step: How to Pick Seats at a Wrestling Pay Per View
- 1. Start With the Event and Venue, Not the Section Number
- 2. Locate the Ring, Then Work Out Where the Entrances Run
- 3. Pick a Tier by What You Want to Watch
- 4. Check the Sightline Before You Buy
- 5. Compare Total Cost, Not the Ticket Price
- 6. Match the Seat to Your Height and Your Priorities
- 7. Confirm the Purchase and Plan the Night
- Common Mistakes and How to Fix Them
- Frequently Asked Questions
- Where is the best place to sit at a WWE show?
- Is there a way to pick seats on Ticketmaster?
- Are floor seats a good view for wrestling?
- How early should I arrive at a wrestling event?
- Are verified resale tickets on Ticketmaster safe to buy?
- What are obstructed view seats at a wrestling show?
- Conclusion: Pick the Section First, Then Buy
What You Need Before You Open the Seat Map
Get these six things settled first, and the seat map will make sense on its own.
- The event and venue. Not every pay-per-view runs in an arena. Some run in stadiums, some in resort halls and ballroom-style rooms, and the naming convention changes completely between them.
- The official seat map. The promotion’s official ticketing page carries the only chart that reflects the actual production for that specific show.
- A firm budget ceiling for one ticket, all in. Decide this before you browse, not after you fall in love with a section.
- Your viewing priority. The moves, the entrances, the crowd, the production, or the price. You can only really have two of those at once.
- Your height. If you are around six foot three or taller, this changes the answer more than any other single factor.
- Accessibility or companion-ticket needs, if any. Accessible seating is handled by the venue, not the general sale, and it sells out on its own timeline.
Ticket policies and section names shift year to year, so treat any seat guide you read as current for 2026 and check the venue’s own chart before paying.
Step-by-Step: How to Pick Seats at a Wrestling Pay Per View
1. Start With the Event and Venue, Not the Section Number
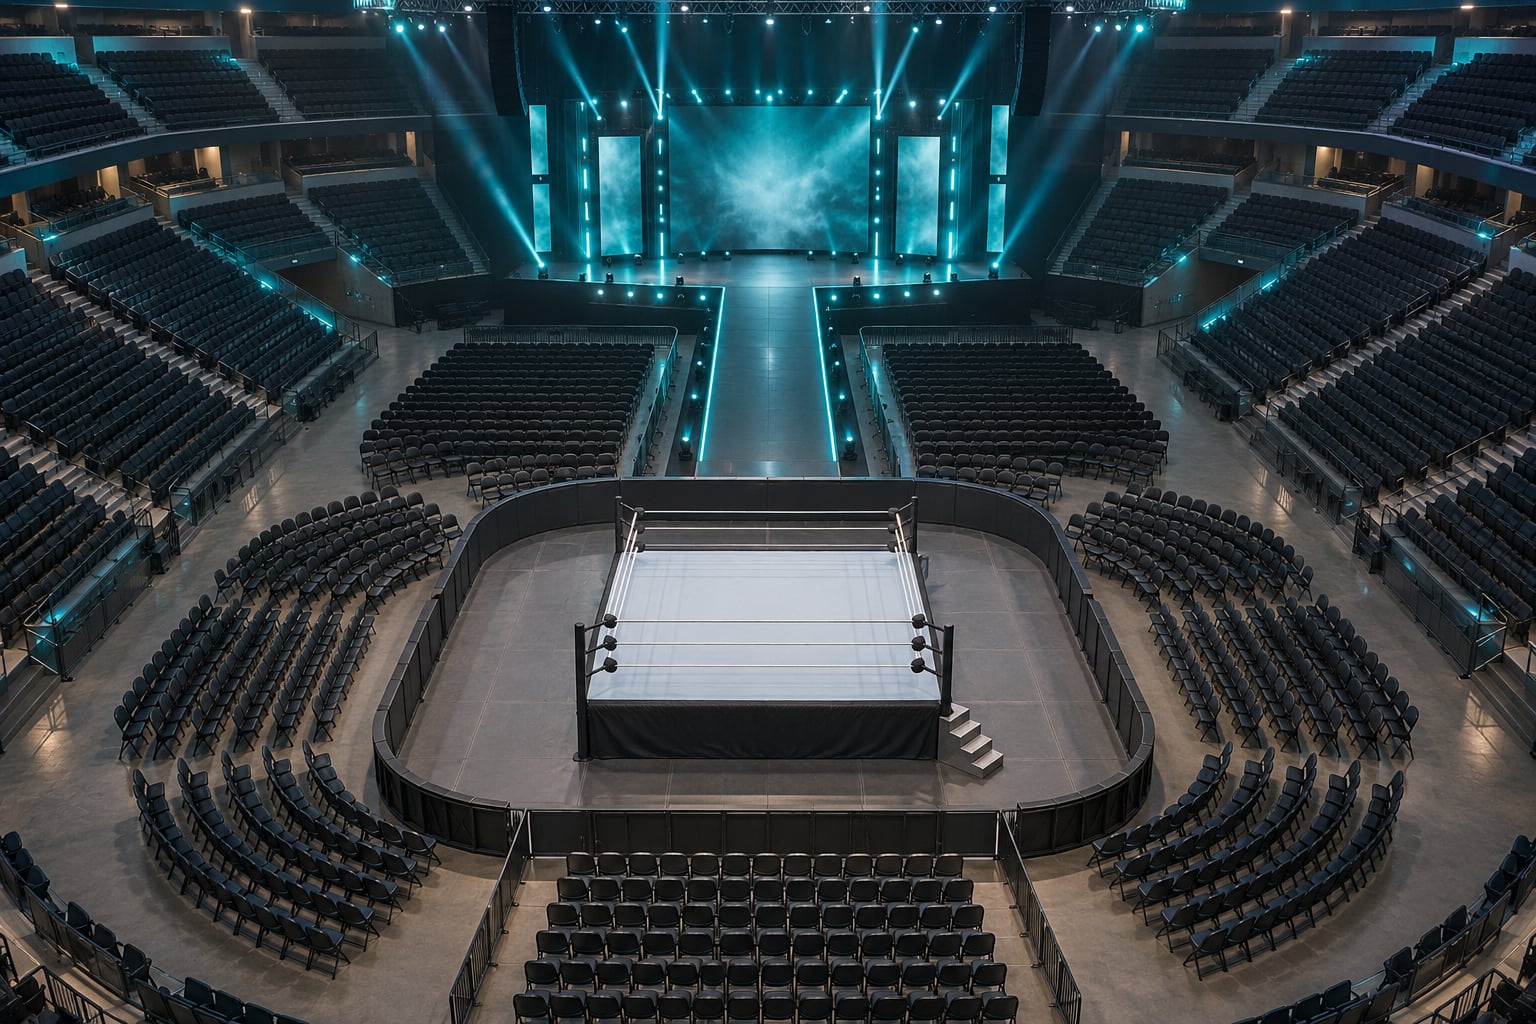
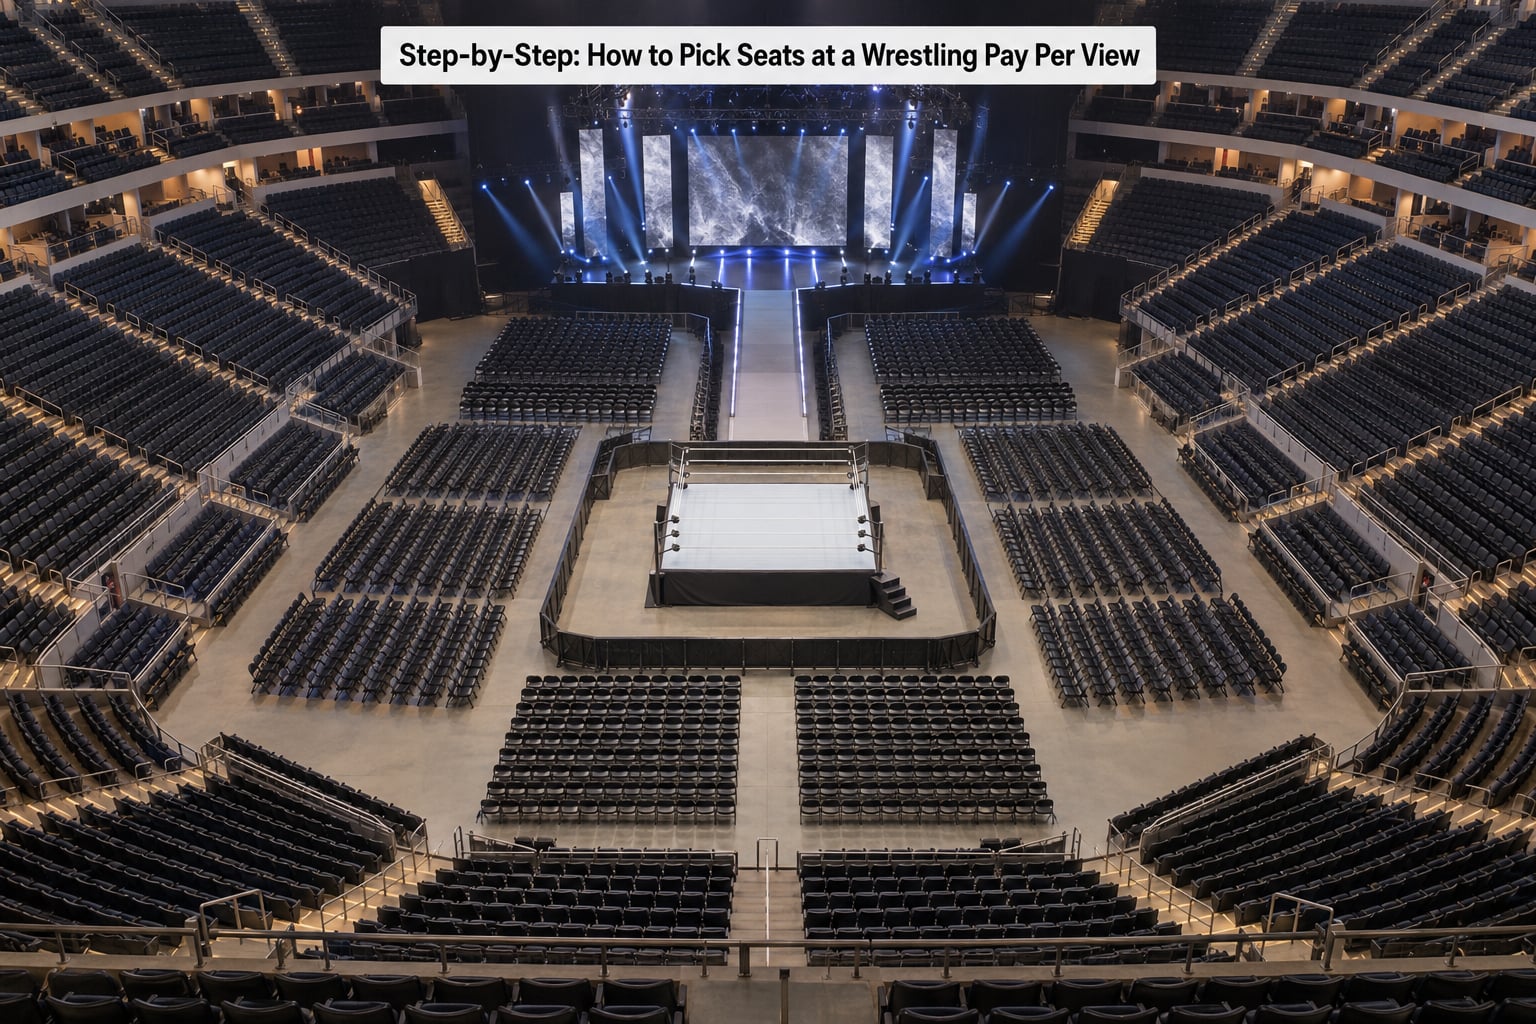
Section numbers mean nothing on their own. In most arenas the 100s are the lowest level and closest to the floor, the 200s sit above and behind them as club level, and the 300s are the upper deck. At a stadium event the same numbers describe a completely different geometry, with sections spread around a much larger bowl and the ring sitting on a raised platform.
Open the venue’s official page and look for three things: the seating chart, the announced start time and any production note. A show with a stage and a long ramp laid out across the floor has different sightlines from a standard ring setup, and the map will tell you which sections sit behind that structure.
Also find the presale code and the general on-sale time. Wrestling tickets for major cards routinely sell through in minutes, and a good seat picked one day late is a bad seat picked fast.
2. Locate the Ring, Then Work Out Where the Entrances Run
Find the ring on the map first. Everything else is a distance measured from it.
Then find the stage and the entrance ramp, because that is the part people forget. The ramp is the single biggest differentiator between seating zones at a wrestling show. Sections along the ramp see the full pyro, the gear reveal and the walk to the ring; sections on the far side see a wrestler appear from a tunnel twenty seconds after the moment everyone else is watching.
Fans who travel for WrestleMania learn this quickly. A seat 40 rows further back but on the ramp side beats a closer seat behind the stage every time, and it usually costs less.
3. Pick a Tier by What You Want to Watch
Here is the tier breakdown, and it applies to most arenas of roughly 15,000 to 20,000 seats. Prices vary hugely between a house show and a stadium main event, so treat the last column as relative rather than literal.
| Seat tier | What you actually see | Best for | Watch out for |
|---|---|---|---|
| Ringside, first row | Everything, at full height in your face | Die-hard fans, once-in-a-lifetime nights | Highest cost band, sell out before general sale, no view of the whole ring |
| Floor, rows 1-2 | Close and clear, whole ring visible | Groups that want proximity | Row 1 sees the mat better than the action |
| Floor, row 3 and back | The back of a head for most of the card | Almost nobody, honestly | Heads block the ring from row 3 onward |
| First lower bowl, 100s | Full ring, ramp and stage, moderate size | The best balance of view, atmosphere and cost | Front rows of the section can have a steep head in front |
| Club level, 200s | Full production, wider view, smaller wrestlers | Fans who want the entrances and the whole show | Longer walk in, chair-back rows vary by venue |
| Upper deck, 300s | The arena as a spectacle, details lost | Budget buyers and big-group outings | Far corner sections and blocks behind the stage |
| Obstructed view | A pillar, railing or overhanging section takes part of the ring | Cheapest available seats | Check exactly what is blocked before buying |
| Suites and VIP | Elevated, private balcony, catering included | Groups and corporate days out | Highest band, glass can tint the view |
If you take one thing from this table, take this: the first lower-bowl section is where to pick seats at a wrestling pay-per-view unless you have a specific reason to leave it.
4. Check the Sightline Before You Buy
Distance matters less than angle. A seat 20 rows back in a steeply raked lower bowl often beats row 3 of a shallow one, because the rise keeps the row in front below your eyeline.
Run through four checks on any seat you are considering.
- Head-to-head test. Can you see the near edge of the mat past the person in front of you? If not, you are watching shoulders.
- Rise test. Riser-style rows step upward and preserve sightlines. Flat chair-back rows on the club level can put a seated head right in your line at a standing moment.
- Obstruction test. Look for pillars, railings at the front of the section, overhanging decks and the section overhang itself. Obstructed-view seats are not a scam, they are simply a different product — just know what is blocked.
- Distance test. Can you pick out tattoos? If yes, you are close enough. If you are squinting at gear from the 300s, you are paying for an arena tour rather than a wrestling show.
Search the venue name plus “view from my seat” before you commit. Real photos from the exact section beat any generic tier description.
5. Compare Total Cost, Not the Ticket Price
The number on the listing is not what you pay. Per-ticket service fees, facility charges and delivery charges get added at checkout, and some listings marked as premium pricing carry a markup on top of everything else. That premium-priced label is a separate thing from a resale listing: the ticket itself is the same seat, the price is simply higher.
Two levers reduce what you actually hand over. Buying at the venue box office on the day of the show usually skips the per-ticket service fee, though you accept the risk of the good sections being gone. And picking one tier down from your dream section often costs you very little in view while removing the entire resale markup.
Add parking, travel and any pre-show meet-and-greet cost to the comparison. A floor ticket that looks like the premium choice can end up worse value than a lower-bowl seat once the whole evening is priced out.
6. Match the Seat to Your Height and Your Priorities
This is the step most guides skip. If you are around six foot three or taller, avoid the floor. You will be looking through heads for three hours, and the premium you paid buys you a closer look at the back of a stranger’s neck. First or second row on the floor is the only floor spot that reliably works, and those sell out first.
Under about five foot five, do the opposite of what instinct tells you. Climb to the 100s or 200s rather than the back of a section — the rise and the rake put you above the crowd instead of behind it.
For everyone else, match the seat to the priority:
- Best view: first lower-bowl section, aisle, a few rows back.
- Best atmosphere and sound: floor row 1 or 2, or the front of a lower-bowl section.
- Entrances and production: club level or an upper section on the ramp side.
- Bringing someone who does not follow wrestling: club level. The wider view tells the story better than the floor does.
- Young children: lower bowl, aisle seat, easy exit, and check the venue’s lap-ticket policy for under-tens.
- Lowest sensible cost: club level or an upper section away from the stage, bought direct rather than resale.
- Wheelchair access: contact the venue’s box office directly, since accessible seating and companion tickets are allocated separately.
7. Confirm the Purchase and Plan the Night
Before you pay, confirm four things on the confirmation screen: the section number, the row, the seat numbers and how many seats are in the group. A digital transfer or mobile entry means you get nothing for a reissued seat, so accuracy at checkout is the whole safety net.
Buy only from the official ticketing platform or a recognised resale exchange attached to it. Fan reports on wrestling forums are consistent on this: unofficial sellers produce duplicated seats, fake transfers and long, expensive arguments at the gate.
Then plan the arrival. For a pay-per-view, arrive well before doors if merch matters to you, and comfortably before the advertised start in any case. Security lines at major cards run long, and arena food is overpriced enough that eating beforehand is the standard move. Check the venue’s bag policy and its rules on phones and photography before you queue.
One last thing: at large shows, sections get darkened or tarped off for production, and fans have reported being relocated on arrival with a ticket that carries no extra value. Buy from the official sale wherever you can so that if something changes, you are the one holding the primary purchase.
Common Mistakes and How to Fix Them
- Choosing by section number alone. “100s level” tells you the level, not the view. Fix: run the four sightline checks on the specific section and row.
- Buying floor seats in row 6 and expecting a ring view. Reported often enough in ticket threads to be a rule of thumb. Fix: floor means row 1 or 2, or pick the lower bowl instead.
- Buying behind the stage or the ramp. The entrance is the best part of the show and you will miss most of it. Fix: find the stage on the map and pick the ramp side.
- Ignoring the seating chart because the section name sounded good. Club level is not the same depth in every building. Fix: check the chart for your specific venue.
- Waiting until general sale to decide. Good lower-bowl seats are usually gone by then. Fix: know your two acceptable sections before the presale opens and buy inside the first minutes.
- Buying from an unverified seller to save time. Fix: official platform or its attached resale only, and check the transfer method before you pay.
- Forgetting height entirely. Over six foot three on the floor, or under five foot five in the back of a section, are both poor outcomes. Fix: apply the rule in step 6 before checkout.
Frequently Asked Questions
Where is the best place to sit at a WWE show?
The first lower-bowl section, usually on the 100s level, a few rows back on an aisle, is the best balance of ring view, ramp view, atmosphere and price. Ringside is closer but you see less of the whole ring once you are past the first two rows. If you want the entrances most, move one level up to the club level on the ramp side.
Is there a way to pick seats on Ticketmaster?
Yes. Open the event, choose the seat map view instead of the list view, and click a section to see its rows and exact seat numbers before adding anything. You are selecting the seat yourself rather than accepting a best-available suggestion, which is what produces seat-by-seat choices. Check whether the listing is marked as premium pricing, because those carry a markup on the same seat.
Are floor seats a good view for wrestling?
Only in the first two rows. Past that, the people seated in front block the mat, and because a wrestling ring is square and set at floor level you end up looking at heads rather than over them. Fans in ticket threads describe floor row 6 as a poor view for exactly this reason. If you want closeness, buy row 1 or 2; otherwise take the lower bowl.
How early should I arrive at a wrestling event?
For a pay-per-view, arrive at least an hour before the advertised start, and considerably earlier if you want merchandise or a good entrance-viewing spot near the stage. Security screening and bag checks are the bottleneck at major cards. Eating beforehand also saves money and time, since arena food prices are high and concession queues lengthen once the show begins.
Are verified resale tickets on Ticketmaster safe to buy?
Resale attached to the official platform is the safer option because the ticket stays traceable and is issued as a proper transfer, so it cannot be duplicated the way a screenshot can. You will pay a markup on top of the face value, and the buyer often eats the fee. Never buy from a marketplace listing you cannot verify, and confirm the delivery method before paying.
What are obstructed view seats at a wrestling show?
They are seats where a pillar, railing, overhanging deck, the stage or the entrance ramp blocks part of the ring. They are sold openly because they are genuinely cheaper, not because they are bad stock. Before buying one, find out what specifically is blocked, and never take an obstructed seat behind the stage, since that also costs you the entrances.
Conclusion: Pick the Section First, Then Buy
Start with the venue’s own seating chart for the show in front of you, find the ring and the ramp, and then compare the first lower-bowl section against the club level on the ramp side. Buy the cheaper of those two that still matches your height and your budget, and do it inside the presale window rather than on general sale day.